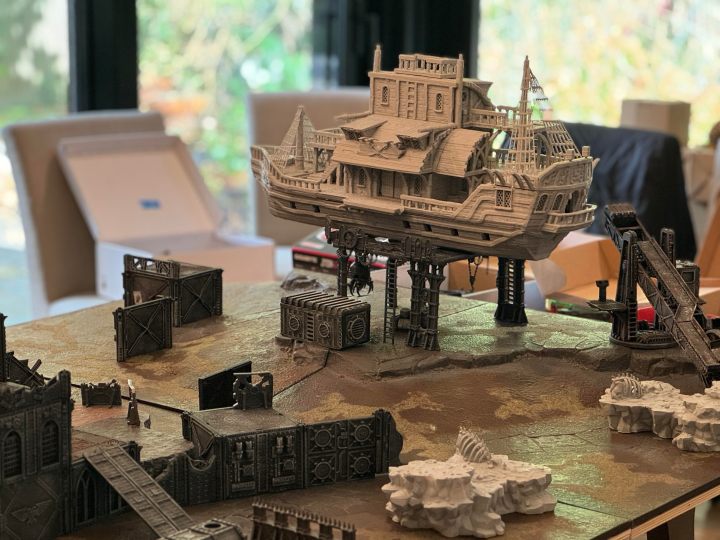
We followed up our mid-point ash wastes campaign game with two head-to-head games a few weeks later. In between we got some new Necromunda terrain! We used it on the boards to gain a sense of size and space. Before picking scenarios we set up a 6′ x 4′ board. This is our typical setup which we split in half running side-by-side 3′ x 4′ fields of play.
Starting View of the Battlefield Terrain:


A quick shout out to Centurion 3D Studios for two new pieces of terrain! The super cool pirate ship I want to turn into an elevated gambling den over time. The setup felt a bit like the ship was on scaffolding, elevated for repair. The destroyed modular bridge is also excellent. While it seems geared to a fantasy gaming aesthetic, I think is works. It’s a remnant of an ancient time on Necromunda or the Ash Wastes.
GAME A: Cawdor vs. Venators
Venators and Cawdor ended up in an ambush fight. It included the rule where anyone on the battlefield surface using a strength 5+ weapon had a penalty. Shots resulted in a large blast marker strength 4 hit centered over the firing ganger. Notably, we got to use an old banged up bridge as cool Necromunda terrain. Venators were the attackers for the ambush and got 3 gangers to activate before the defender. Unfortunately, I didn’t get a lot of the game photos, but below tells the story well:

Notable Moments:
1. Cawdor on an Open Fire: Given the distance setup rules. Two bikers with hand flamers were close enough to move and then shoot. This pinned 5 Cawdor and blazed their leader. Followed up to that was a champion on the building roof with a crack grenade into a biker.
2. “I Died for the Big Boom”: A Cawdor bonepicker threw a demo charge from the battlefield surface at the Venator leader. It caused a serious injury, but resulted in the strength 4 blast on himself, taking him out of action. Win for the bonepicker.
3. Winning by Losing?: As a significant underdog, Cawdor used a tactic giving them 1d6 x 10 credits for every fighter that went out of action. Given no credit rewards for the scenario winner or loser, with his gang rating behind, this was a win. His 4 out of action gangers resulted in 140 credits. So Necromunda it hurts…and we love it.
Summary: Venators win. Cawdor couldn’t recover from the early flames and mobilize themselves off the board. 1 ridge walker made it off the back edge road, negating the attacker winning bonus condition. In the end Cawdor voluntarily fled the battle.
GAME B: Genestealer Cult vs. Orlocks:
Genestealer Cult and Orlocks played the Looters scenario. However, after reading some feedback on the toughness of winning this scenario for the attacker they modified it to a basic fight. To keep a semblance of the scenario they fought over 3 loot crates spread across the middle of the battlefield. Since I was playing the other game next to them, I don’t have a great play-by-play, but here are some pics. While not of strategic importance this game, in this case the elevated pirate ship visually was great Necromunda terrain.


Notable Moments:
1. One Shot; One Kill! The very first shot of the game (Orlock) killed a genestealer cult ganger.
2. I See Your Demo Charge, Engulf Your Mind, and Destroy Your other Demo Charge: Around turn 2, the Genestealer cult leader was able to get just within mind control range. He took one of the 3 wreckers with a demo charge and successfully launched it at another one. In one action a wrecker was dead and 2 demo charges were gone.
3. Winner (Genestealer Cult) Took 3 Trade Routes! Turns out the road section won connected 3 trade routes. This, combined with winning and taking all the loot crates, resulted in over 200 credits! A monster haul in the Ash Wastes.
Summary: Both games were quick a fun, clocking in around 2 hours each. We’ve got 2 cycle games left then another 4-player free for all to close the campaign out. Does anyone have a good format for sharing standings throughout a campaign? All ideas welcome.
Subscribe below to get all new updates.
Leave a Reply